This recipe was updated & slightly modified in April 2022.
These Iced Lemon Cookies are soft, tangy, and bursting with lemon flavor. Made in one bowl, and ready in no time, these cookies are perfect for spring…or any time a lemon cravings kicks in!
Soft Iced Lemon Cookies
It’s still citrus season, and is it just me or does the coming of spring scream CITRUS DESSERT TIME? Lemon, orange, grapefruit, and lime. All of those fruits peak during the cold season here in North America, but they’ll forever remind me of the warmer spring and summer seasons; after all, I didn’t even know that winter was citrus season until I started food blogging. Anyway, these Soft Iced Lemon Cookies are the perfect (seasonally appropriate!) dessert to take us into warmer weather. A sweet, chewy sugar cookie flavored with fresh lemon zest and then topped with a tangy lemon icing with lots of lemon juice. So good. And if you’re going to cheat on chocolate, it might as well be with these sweet gems 😉

This cookie dough is my favorite dough for any and all chewy sugar cookies, and this version is quick and so easy – no refrigeration required! Plus the icing is a simple, 4-ingredient mix! Basically, if you want lemon cookies to eat right now, or you don’t have a lot of time to bake, then this recipe is for you! These cookies also save really well, so if you want to make them the day before an event, they’ll still be soft and chewy the next day. In fact, I like them even better after given a day to set/rest.

More Lemon Recipes
Lemon Ginger Cupcakes
Golden Oreo Lemon Cookie Bars
Lemon Cake Donuts with Lemon Icing
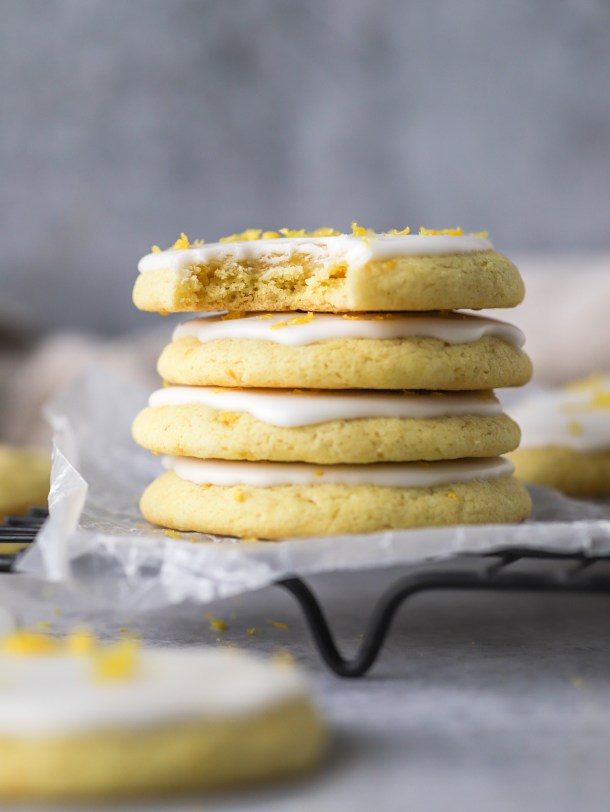
Soft Iced Lemon Cookies

Soft and chewy lemon sugar cookies topped with a sweet, tangy lemon icing. The perfect quick and easy cookie for any citrus lover!
Ingredients
Lemon Cookies
- 1 large egg + 1 large egg yolk
- 2/3 cup (148g) white granulated sugar
- 1/3 cup olive oil (see Note 1)
- 1/2 tsp lemon extract
- 1/2 tsp almond extract (or vanilla extract)
- 3/4 tsp baking powder
- 1/2 tsp baking soda
- 1/2 tsp salt
- 1 1/2 cups (195g) all-purpose flour
- Zest from 3 lemons
Lemon Icing
- 2 cups (240g) powdered sugar
- 1/2 tsp almond extract (optional)
- Juice from 1-2 lemons (2-3 Tbsp)
- Zest from 1-2 lemons
Instructions
Bake the Cookies
- Preheat your oven to 350°F and line a baking sheet with parchment paper.
- In a medium bowl, whisk together the egg, egg yolk, sugar, oil, and extracts. Whisk in the baking powder, baking soda, and salt. Add the flour and use a large wooden spoon (or other utensil) to work the ingredients together. Finally, mix in the lemon zest.
- Scoop 6-8 dough balls 1 1/2 Tbsp in size on your prepared baking sheet. Gently roll the dough balls smooth, re-shaping into perfect circles as needed. Slightly flatten each dough ball.
- Bake cookies at 350°F for 6-8 minutes - be careful not to over bake as that will lead to dry cookies.
- Allow the cookies to cool on the baking sheet for 2 minutes before moving to a wire cooling rack. Repeat Steps 3-5 until all cookies are baked.
Frost the Cookies
- Once the cookies have cooled completely, you can make the icing. In a medium bowl, add the powdered sugar, almond extract (if using), and 1 Tbsp of lemon juice. Mix until combined. Add more lemon juice, 1 tsp at a time, until you've got a thick glaze - when you drizzle the glaze on itself, it should take 3-4 seconds for the ribbons to disappear.
- Spoon the glaze/icing onto each cookie, using the back of your spoon to spread the icing over the cookie surfaces. Allow the icing to set before sprinkling fresh lemon zest over the cookies.
- Once set, store the cookies in a single layer in an airtight container at room temperature.
Notes
- Oil: make sure to scrape out ALL of the oil and use a liquid measuring cup.
- Sugar: feel free to use any kind of plain granulated cane sugar for the cookie dough: white granulated sugar, unrefined granulated sugar, raw sugar, etc.
Did you make this recipe?
Tag @sugaredandstirred on Instagram and hashtag #sugaredandstirred


